Monday, March 4, 2013

Cold pause

A really cool feature of the MakerBot Replicator 2 is its ability to go into "cold pause", that is, to stop printing and move the nozzle off to the side. You can resume the build anytime you like later on. Presumably you could use the cold pause to change filament color, although I have not tried that yet. (The Replicator 1 and the Replicator 2X both have dual extruders but the Replicator 2 does not.) Here is a picture of a cold pause of a decorated cube; note the hexagonal fill that the MakerWare software automatically uses to fill the inside:


You might be wondering to yourself: Do I *really* need to put blue painter's tape on the build platform? The answer is yes. Yes, you do. I thought perhaps I could fly free without the tape at first and life was good until an error during a print of an astrolabe part caused me to change my mind. Here is what the part of my build plate I now call the "bottom" looks like, with some stuck-on pieces that are taking me forever to remove:


You might also be wondering: Is it *really* okay to cold pause and stop the printing, then restart again? Isn't it possible that pausing might cause an inaccuracy in the print job when I restart the print? The answer is yes. Yes, it might. At least if you bump the build plate with your hand when trying to take a picture of the hex fill inside your videogame die.

Sunday, March 3, 2013

Filament

The building material for the Replicator 2 is PolyLactic Acid, or "PLA". It comes as filament wound on spools like the ones you see below. The half spool of naturally colored PLA on the top came with the Replicator 2. The MakerBot site sells a handful of colors for $48 each; the opaque green and semi-translucent blue came from there, and at the moment it feels like they will last forever, at least for the small objects that we've been printing. (The tiny TARDIS you see in the picture was printed in an opaque darker blue and my guess is that is was made from ABS material on a Replicator 1; it came from the Makerbot Retail Store's "Gumball Machine".)


So far the PLA has been working very well. My only complaint is that it is very shiny, which sometimes makes it difficult to see small details in a model. However, the overall look is very nice, especially for the more translucent colors.

You can get spools of PLA filament from many places online. Our Replicator 2 takes 1.75mm filament so we ordered some 1.75 filament from amazon.com. It works fine in the printer but the spool does not fit on the Replicator 2's spool handle. Nothing that can't be fixed with a pencil, rubber bands, and a box, though:

Of course, with a 3D printer one could also print a smaller spool holder:


Here's a hint about changing filament in the Replicator 2: Through the "Utilities" menu you can select "Change Filament" and then either "Load" or "Unload". The "Load" function heats the extruder and then runs the motor forward; you push the filament through until it starts extruding. (Basically this machine is just a giant glue gun, so if you've loaded a heated glue gun then you know how to load the Replicator 2.) The "Unload" function runs the motor in reverse so you can pull out the filament. One time we could not get the filament to pull out during the unload process. Under the assumption that maybe the filament had made some kind of ball or obstruction that we couldn't pull through, we ran the "Load" function, let it extrude for a couple of seconds, removed what was extruded, and then ran "Unload". It worked great and now I do all all unloads this way, with a quick "Load" to start and clear out anything that might be in the way.

Printing heads

I hear that if you have a Kinect then you can turn it into a 3D scanner to make files suitable for 3D printing. I don't have one of those (yet?), but at the MakerBot Retail Store in NYC where we picked up the Replicator 2, they have a 3D photo booth. My son and I each got three scans of our head; the picture below shows his three prints on the left and my three on the right. The black at the bottom of each print is due to some leftover filament from the previous print job. They tell you to take off your glasses for the scan, but I didn't listen to that, so my prints look sort of weird (although less weird than seeing myself without my glasses). If you move a little out of frame you get some weird effects, which is what happened with the one of my son in the back row.


Here's a larger print of one of my son's 3D head files. It does look like him, including the crazy curly hair that apparently was too big for the scanner area.  :)


Saturday, March 2, 2013

Printer 1, Cutter 0

One of the first things that we tried to cut with the Craft ROBO Pro was, of course, a Sierpinski carpet. After much frustration and mixed results (extra cut lines, not getting through the paper, bad corners, etc), we let the Replicator 2 have a try. Instead of cutting from thick paper, we printed something thin. The designs below were made in Tinkercad and exported to .stl for the 3d printer. These two things are models of the same object except that the one in the upper right is thicker and it is more difficult to see its smallest holes because of a raft catastrophe. (Don't print a raft under something with such a large flat bottom area; at least with the settings I used, it is impossible to pull off the raft afterwards. In this case the raft is obscuring the smaller holes in the object.) These objects are also the same as the top slice of a Level 3 Menger sponge. The large one is 1 mm thick and the smaller one is 4 mm thick.


The 1 mm thickness of the larger object above makes it a little like a thin coaster. It's sturdy but quite thin - about the thickness of a dime. Actually, because of the ridges and lines from the 3D printing extrusion process on the top of the model, the thickness is between 1 and 1.4 mm, depending on where you measure it.

So how thin can we print with the Replicator 2, and how accurate are those thin prints? The models below were made in Tinkercad (so easy: just drop in a cube, change the height, drop in a number and center it in the square, make the number a "hole", and group the square with the number hole). The numbers indicate the height, in millimeters, of the model.


The Replicator 2 is amazing. Although the thicknesses range in general from 90% to 130% of what they were meant to be, they do get measurably smaller as the numbers decrease, and the 0.1 mm model actually does measure 0.1 mm in many places. The 0.1 mm square is so thin that it is flexible and almost transparent even though we used black filament. A tenth of a millimeter is 100 microns, and the period at the end of this sentence is probably about 600 microns high.

Friday, March 1, 2013

Borromean rings

One of the coolest little objects we've printed so far is this model of the Borromean rings. The Borromean rings consist of three rings that are configured in such a way that all together, the three are linked -- but no two of the rings are linked to each other. This means that you can't unlink or separate the three-ring object, but if you were to remove any of the rings the other two would just fall apart. 


An interesting fact about the Borromean rings is that they can't be made with circles. In the picture above the rings are in fact ovals; if they were circles then they would not be able to be arranged in the Borromean configuration. The cool thing is, the student who was making this model with Tinkercad discovered that first-hand, before she knew that fact. This model was printed on a Replicator 2 with a thin, removable support structure (using the default raft and support Skeinforge settings) that kept the rings separate during the printing process. The model moves freely and can squash down like this:


In the squashed configuration you can start to see that this is actually a three-component spiral link with three strands, three repeats, and an "under-over" pattern, that is, the spiral link known as S(3,3,(-1,1)).  More on this later.

Cutting and Plotting

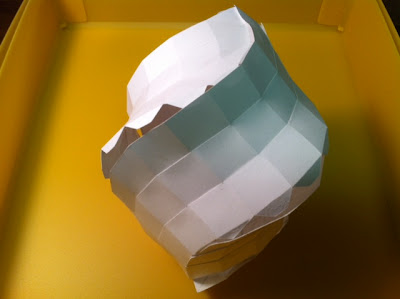
Sometimes I want to smash our Graphtec Craft ROBO Pro cutter. It's a professional vinyl cutter but we always want to cut paper, not vinyl. The Craft ROBO does not want to comply, and we have difficulty getting it to cut through anything heavier than standard copy paper.  In desperation, we finally figured out that we could cut and paste a design over itself so that the cutter would cut all the lines twice, and that finally did the trick, at least for some of our pieces. I think the most successful one so far is this one, where we cut out a paper model with tabs that can be glued up into an interesting shape. In the picture it's only partially glued together so you can still see the tabs: 


Despite our rocky start, the cutter is currently forgiven because it can also draw with a pen attachment in place of the blade. We made it plot some really nice space-filling curves, as you can see below. The cutter head is somehow off alignment at corners but at the moment that is making the drawings look almost handmade so we are leaving it that way for now:


The cutter works through an Adobe Illustrator plug-in that reads files to the Cutting Master software. The files need to be .svg files, which you can find online or convert to from PDF (although this can cause some issues). You can also use Tinkercad to export an .svg file of whatever shape is intersecting the workplane, and we'll be trying Mathematica .svg exports next.

First 3D objects

To print a 3D object you need a description of that object in an .stl file. One of the easiest ways to make a simple .stl file is to construct an object in Tinkercad, an in-browser CAD drawing program that you can use for free (for one design) or a monthly fee (to save multiple designs).   

Here are two prints of a cone that is cut to reveal a parabolic conic section. You can't slice things in half in Tinkercad, but you can start with a cone and then use another object (like a slanted rectangular solid) to make a "hole" in it. I did this for the little piece and then moved the rectangular solid to cut out the other half for the larger piece. They don't fit together perfectly - or stand up very well together - but it is cool to see the parabola. The green model was printed on a Replicator 2 with PLA filament material and the white model was printed on a Replicator 1 with ABS filament material.


Other ways to get .stl files for printing include visiting Shapeways or Thingiverse and downloading an existing design, using the demo files that come with your printer, or even using Minecraft to build something and export to an .stl file (more on this later). You can also use software like Mathematica or MATLAB to generate code for .stl files (more on this later too).

In the picture below, clockwise from the upper left:
  • the one sheet hyperboloid was modeled in Tinkercad, printed on a Replicator 1
  • the white rounded cube was made in Tinkercad (to examine infill properties and resolution), printed on a Replicator 2
  • the green cube was exported from Minecraft (although it is too small to see the details in this model, it is a die with video game designs on the faces), printed on a Replicator 2
  • the dogbone-shaped object is a dual dodecahedron from Thingiverse, printed on a Dimension Elite
  • the Klein bottle was created from MATLAB code and the hole in it was put in with Tinkercad, printed on a Dimension Elite (it is surprisingly thin)
  • the nut and bolt is from a Replicator 2 demo file (it actually screws together very smoothly) and printed on a Replicator 2
  • the chain is from a Replicator 2 demo file (it was printed linked together, with the pieces sort of standing up diagonally on the build platform so they didn't touch) and printed on a Replicator 2

The 6D Lab

On this site I'll catalog the things that we can make in the Department of Mathematics and Statistics at James Madison University in the "6D Lab".

For 3D printing we have a MakerBot Replicator 2:


For cutting paper and vinyl and for drawing with a plotting pen we have a Graphtec Craft ROBO Pro:


We also have occasional access to a MakerBot Replicator 1 at the JMU Institute for Visual Studies and a Dimension Elite 3D Printer and possibly also a powder printer in the JMU Department of Engineering. We can also have things made through shapeways.com.

The objects will start very simply because we are all new to the process of fabricating mathematical objects in Real Life. If you have an idea for an object that you would like us to try to make, please let me know.