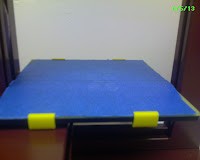
Here is the best way we found to set up the printer to print:
1.Turn on the printer using the switch on the back
2.Start the Afinia software, its logo looks like this:
3.Click from the menu bar 3D print>Initialize the printer should beep and the light should turn solid green (indicating printer ready).
4.It is best to start the table heat as long as possible. (so prints will stick to the build plate). To do this click 3D print>Maintenance then click 'Table heat 1 hr'. It takes about 15 minuets to reach the recommended temperature of 105 C. (This is the minimum time needed before printing, it should be on longer so the whole table)
5.put down blue masking tape on the FR-4 Board (Glass-reinforced Epoxy Laminate, shown below). I recommend 3M scotch-blue painter's tape for multi-surfaces #2090. It is nice and wide and you only have to put down two strips to cover the whole plate. In the picture below you can see one board covered on the left and another uncovered. The surface doesn't have to be perfectly flat but close.
6.Place the board on the (now heating) plate and secure with the yellow clips as shown.
7.If you happen to have moved the printer, changed build plates or your prints aren't coming out right, you have to level the build plate and set nozzle height. Follow steps 7.1-7.9 (reproduced from the manual) below.
7.1 Open the Maintenance dialog box from the 3D Print menu and click the Center button to begin the leveling process.
Maintenance dialoge box
7.2 We want to raise the platform so that it is 2 mm away from the nozzle. If you already know about what that height, should be, enter that height in the To: box, then click the To: button. If you do not yet know this height, Click the To: button to bring the platform to the displayed height, then slowly increment the height until the platform is about 2 mm from the nozzle, clicking To: after each increase.
7.3 Check that the platform is 2 mm away from the nozzle at the center point. If it is not, raise or lower the platform using the To: button so that it is. Then check all four corners and the center are the same distance (2 mm) from the nozzle. Use the blue or orange 2 mm indicator plastic pieces in the afinia parts drawer to determine this.
The 2 mm indicator strips
7.4 If the platform is not the same distance from the nozzle at all five points, you will need to adjust the platform until it is level. There are 3 screws under the platform that are used to level the platform. Loosening a screw will raise the related corner of the platform, while tightening the screw will lower the same part of the platform. So you don't burn your hands, use the short philips screw driver to adjust the leveling screws as shown below.
TIP: Start the table off by screwing the leveling screws all the way in and then loosening each one by 1.25 revolutions.
TIP: Start the table off by screwing the leveling screws all the way in and then loosening each one by 1.25 revolutions.
Adjusting the table level
7.5 Next we want to move the table up so that the nozzle is 0.2 mm away from the table. Once you are about 1mm away from the nozzle, increase the number in the text box by 0.1mm increments and click the To button. Repeat until you get 0.2mm from the nozzle.
TIP: An easy way to check the distance between the nozzle and platform is to fold a piece of paper in two, which will be about 0.2mm thick. Use this as a spacer to gauge the distance between the nozzle and platform.
7.6 Once the table is 0.2 mm away from the nozzle, we have to set the nozzle height. To do this, click the Set Nozzle Height button to save the current height to the printer's memory.
Next see printing with the Afinia H-series printer to start a print!


There is a better plate for this printer at 3Dprinterninja.com
ReplyDeleteit might. At least if you bump the build plate with your hand when trying to take a picture of the hex fill inside your videogame die. druk 3d w medycynie
ReplyDeleteit might. At least if you bump the build plate with your hand when trying to take a picture of the hex fill inside your videogame die. druk 3d w medycynie
ReplyDelete