3D: Volume by Shells and Disks
The goal of this project is to teach students how to create a 3D visualizations of volume by shells and disks for any mathematical function using the following two programs:
Things that you'll need to do before starting to design:
- Determine which function you wish to work with
- Determine radius and heigh of each shell/disk
- Determine how large you want the object to be
So for our example, our team used the following conditions:
- The function used: f(x) = -x^2-x+8 rotated around the y-axis for the x range from 0-2.
- There were four disks and four shells made for this visualization of approximating volume, and with some simple mathematics and some help from the quadratic formula, we were able to determine the radius and heigh of each of the disks and shells.
- For the print, the radius of each object was scaled up by 14mm and the height was scaled by 5mm.
Towers of Hinoi
The base for the popular puzzle 'Towers of Hinoi' is being used since it can lay out the three models in a way that would easily convey the idea that the volumes were similar.
To make the Tower of Hinoi, we used Tinkercad, which can be accessed here: https://tinkercad.com/
- The first step for making the towers is to create the rectangular base. To do this, go into tinkercad and select the box tool and place it down upon the workplane.
- Select the ruler tool and place it down upon the workplane. This allows you to type in the desired dimensions of the object. (We picked a rectangle with dimensions140x70x4mm)
- Select the Workplane tool and place it on top of your rectangle. Doing this will allow you to smoothly place one object onto another.
- Place the ruler on the corner of the rectangle so that the coordinates of the rectangle as compared to the origin of the ruler are (0,0).
- Choose the Cone tool and place it upon the workplane. We gave the cone a diameter of 12mm and a height of 4.28mm. Copy the cone and paste it twice, thus creating two new cones.
- We wanted to place the cone at coordinates (35,35), (105,35), and (175,35). Since the object has a radius of 6mm, we had to place the cones at (29,29), (99,29), (169,29) in order to get the center of the object to the desired coordinates.
- Next, choose the Cylinder tool. We gave the cylinder a diameter of 6 and a height of 35.71
- Now position these cylinders on the platform at (32,32), (102,32), (172,32).
- Now select all of the shapes and click on the group tool at the top right. Now you are done!
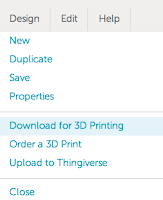
- At the top right, click design and scroll down to 'Download for 3D printing.' Say you want it as an STL and you'll now have your 3D model available to be imported into other 3D software!

Now that you have a basic understanding of how the design is made, try tinkering the rest of these basic shapes yourself! You'll want to make the hols slightly wider so that when everything is 3d printed, they will fit together nicely! (We would tell you how much wider the holes would be, but it appears the additional layer thickness that the machine produces varies depending on what model you have) If you still are lost, follow some of the tutorials on the tinkercad website under LEARN. Also, don't forget to add the hole in your design for the cone at the bottom of the tower.
OH! One more note.
To make the actual function, we typed the following into Mathematica:
RevolutionPlot3D[function,{x,0,2}]
Export["Name of file.stl",%]

 Mathematica
  Tinkercad


No comments:
Post a Comment